Adding a Banner to the Dynamics AX 2012 Role Center
Posted by Author, Curator, Visually Impared Squirrel Literacy Advocate & Dynamics AX Technical Solution Professional (TSP) at Microsoft on
Role Centers are cool, but you don’t have to just personalize them with Dynamics AX information – you have a whole slew of standard SharePoint web parts that you can use to spice up the pages.
An example of something that you may want to do is add a banner image to the role center to display corporate banners or branding information. This is easy to do – all you need to do is create the banner image and then add it to your role center through the personalization.
If this sounds interesting to you all then just read on and learn how you.
Creating A Banner Using PowerPoint
The first task that we need to do is create the banner image that we can use within the role center. You can do this a number of different ways. but if you want a quick and easy option that doesn’t involve you using Photoshop or Paint Shop Pro, then do what I do and use PowerPoint. This allows you to quickly lay out your banner artwork and text and then just save it as an image file.
How to Do It…
Start off by opening up the PowerPoint banner template and laying out the banner with any images and backgrounds that you like. You can also resize the PowerPoint to make it taller or shorter depending on the artwork of the customer.
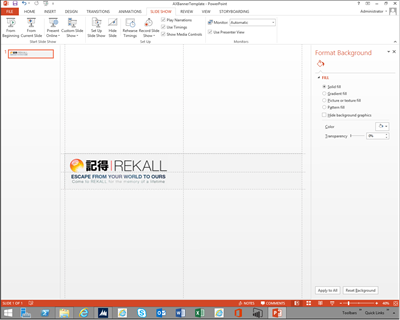
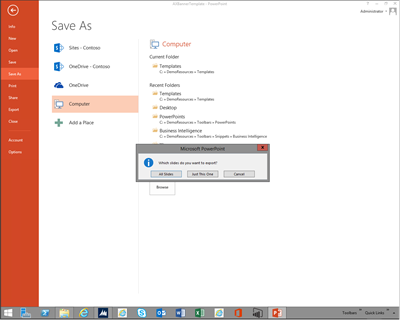
Then save the banner locally, but select the JPEG option as the Save As Type.

When you do save the PowerPoint it will ask you if you want to save all of the slides, or just one – click on the Just This One so that it doesn’t create a folder structure for the image.
Creating A Picture Library Within SharePoint
Once you have your banner created you need to put it somewhere that the Role Center is able to find it, and SharePoint will only allow you to reference a URL, so using your local filing system will not cut it. So to get around this problem we will just want to create a new Picture Library within the Enterprise Portal that we can store our banners away in. Then we can reference them through a URL and also we have a centralized location for any other banners that we want to create.
How to Do It…
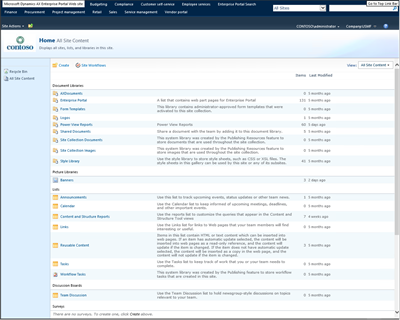
To do this, open up the default Enterprise Portal Web Site, click on the Site Actions dropdown list and then select the View All Site Content menu item.

When the All Site Content view is shown, click on the Create button at the top of the form.
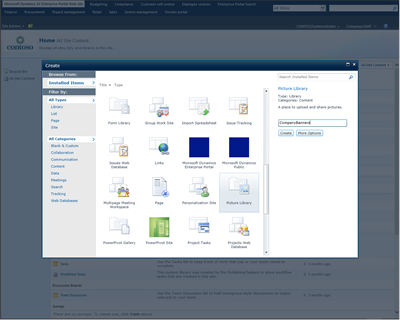
When the Create Gallery is displayed, scroll down and find the Picture Library give the library a name and then click on the Create button.
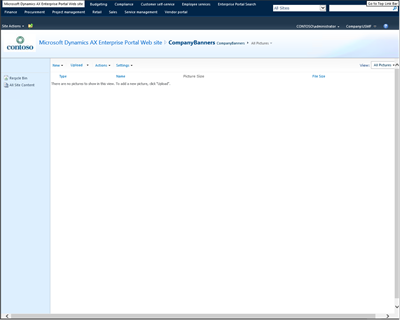
This will open up the new library for you and you can click on the Upload button in the menu bar.
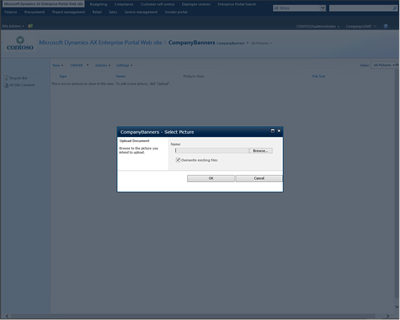
When the Select Picture dialog box is displayed, click on the Browse button.
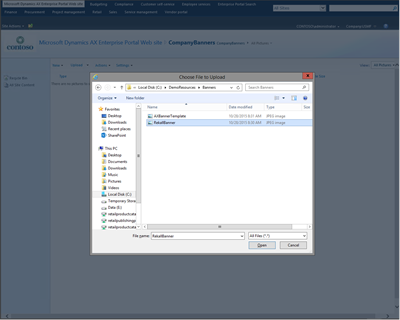
Then navigate to the banner that you just saved and click on the Open button.
When you return to the Select Picture dialog box, click on the OK button.

This will open up the banner properties and you can save the data and exit from the form.

When you return back to the Pictures library you will now se the banner. Before we exit from here we need to find out what the URL is for the picture. So just click on it.

When the picture details are shown, click on the picture thumbnail again.

This will open up the image and you will see in the address bar that you have the URL for the image. Copy that URL away for later on.

Creating Adding A Banner To The Role Center
Now that we have the banner and also it’s filed away somewhere that we can access it we can now add it to our Role Center through the Personalization function.
How to Do It…
To do this return to the Dynamics AX Role Center and click on the Personalize button.

When the personalization view is displayed, click on the Add Web Part link within the InfoLog panel.

This will open up the Web Part browser. Select the Category of Media and Content and then select the Image Viewer web part. When you have done that, click on the Add button.
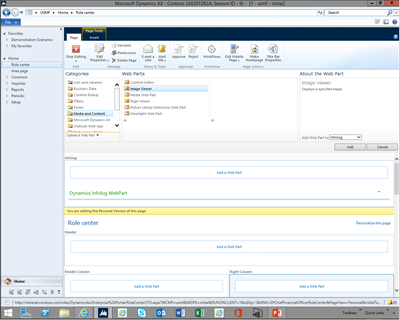
When you return to the Role Center you will see that you have a new Image Viewer web part. Click on the Open The Tool Pane hyperlink.
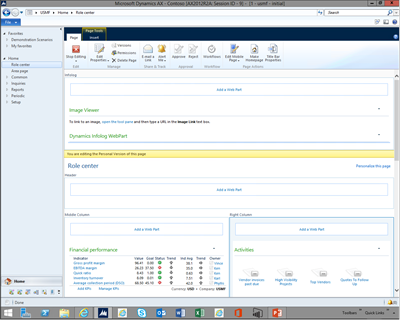
This will open up the properties panel for the Web Part.
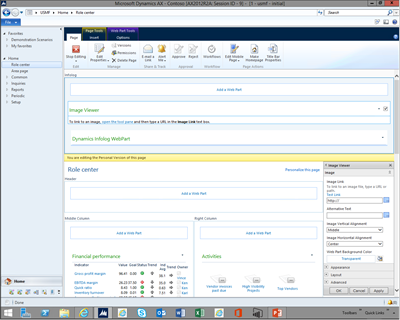
Paste the URL for the image into the Image Link field.
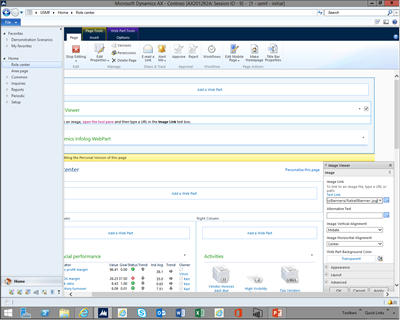
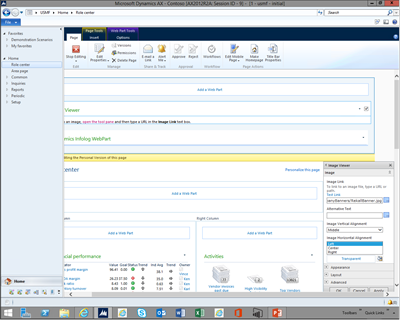
Then click on the Image Horizontal Alignment dropdown list and select the Left option to align the image to the left hand side.
Then expand the Appearance group and click on the Chrome dropdown list and select the None option. This will remove the header and borders around the Web Part which makes things look a little nicer.
When you have done that click on the OK button.
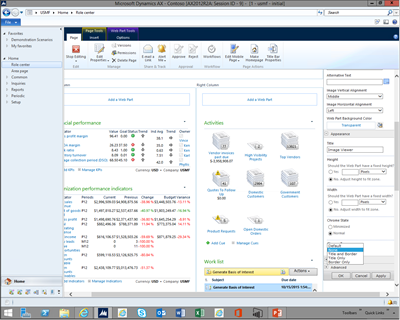
When you return to the Role Center you will see that the image is now shown. To exit the personalization mode click on the Stop Editing button in the ribbon bar.
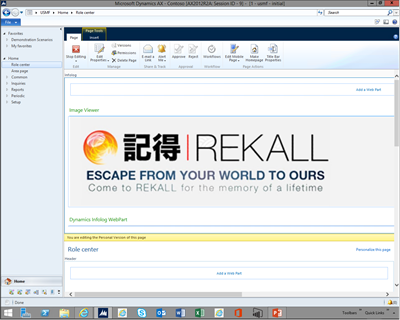
When you return back to the role center you will see that your banner is shown, and also because we put it in the top most area, it will always stay at the top of the Role Center.

Conclusion
Adding banners to the Role Centers are a great way to use the Role Center for corporate branding, to add seasonal messages, and even to promote events and activities that the users may be interested in. Because the banners are stored within the Enterprise Portal, it is also easy to switch out the images at any time making the administration a breeze.
What are you waiting for? Start building your own banners already!
About The Author
Murray Fife is a Technical Solution Professional at Microsoft and Author of over 25 books on Microsoft Dynamics AX including the Bare Bones Configuration Guide Series which contains over 15 books that show novice users host to set up Dynamics AX using visual walkthroughs. These guides start off with the Financial modules of Dynamics AX and then progress through the Operational, Distribution, and then the more specialized modules like production, service management, and project accounting. You can find all of his books on Amazon (www.amazon.com/author/murrayfife) and also even more on the independent BSP (www.blindsquirrelpublishing.com) site.
Murray is also the curator of the Dynamics AX Companions (www.dynamicsaxcompanions.com) site which he built from the ground up as a resource for all of the Dynamics AX community where you can find walkthroughs and blueprints that he created since first being introduced to the Dynamics AX product.
Throughout his 25+ years of experience in the software industry he has worked in many different roles during his career, including as a developer, an implementation consultant, a trainer and a demo guy within the partner channel which gives him a great understanding of the requirements for both customers and partners perspective.
He is also a great supporter of the Dynamics AX community and has hosted scores webinars for the AX User Group (www.axug.com) and MS Dynamics World (www.msdynamicsworld.com), and has speaks at Microsoft Convergence and AXUG Summit conferences regularly.
Share this post
- 0 comment
- Tags: Uncategorized
0 comment
