Creating a Mobile AX Application for Dynamics
Posted by Author, Curator, Visually Impared Squirrel Literacy Advocate & Dynamics AX Technical Solution Professional (TSP) at Microsoft on
With the Update 2 release of Dynamics, a new preview feature was made available within the product that allows you to create mobile applications for Dynamics directly through the application itself.
These mobile workspaces and forms will run in connected mode, will cache information and run in a disconnected mode, and also allow you to update data within Dynamics when connected, or disconnected as well (the disconnected updates occur when you regain your internet connection).
Although this feature has not been officially released, we can take a look at what it does right now and see how it works.
Enabling the Mobile Options
The first thing that we need to do is to enable the feature so that we can start seeing all of the mobile options that are available to us.
In order to do this, just add the following parameter to the end of the Dynamics URL:
&mode=mobile

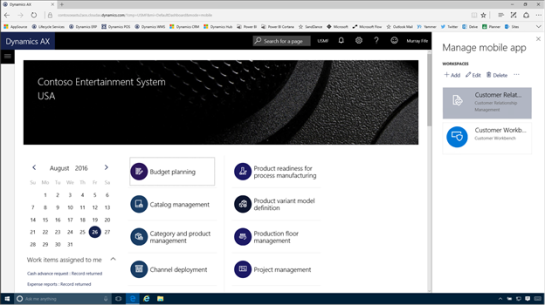
This will add a new Mobile app option to the options menu.

If you click on the menu item, then a panel will show up on the right hand side that will allow you to start editing and creating new workspaces.
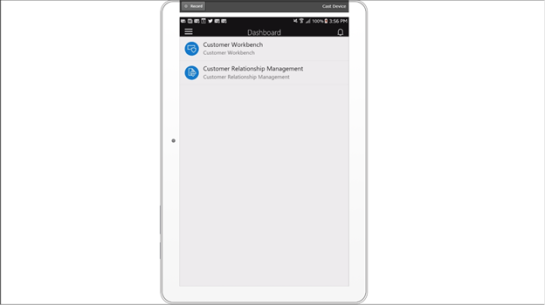
The second part of this feature is the mobile app itself. This is just another client for Dynamics and will run on Android, iOS, and I assume the Windows platform as well.
Luckily I have got a pre-release version so that we can see it in action.
Notice that the workspaces that were in the Dynamics Mobile manager form show up here as well.
Creating a new Mobile App
To create a mobile app, all we need to do is click on the + Add button within the Manage mobile app panel.

This will open up another screen where you will be able to define the main workspace for the app – which is the icon that shows up on the mobile device.
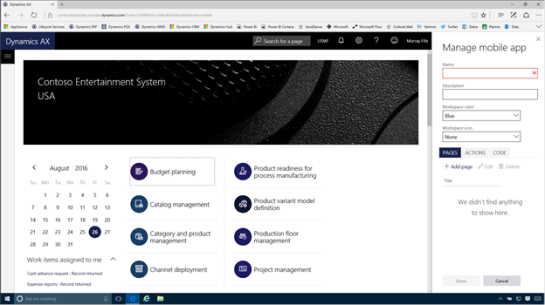
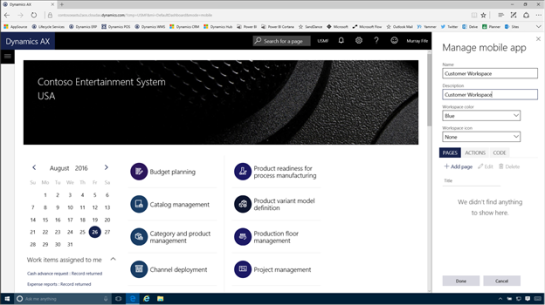
All we do here is enter in a Name and a Description.
If we want to we can also select a Workspace icon from the default icon list, and even the Workspace color.

Creating a Mobile App Page
Now that we have defined our app we can start adding pages to the app. To do this, just click on the Add page button.
This will open up a new page screen.

Enter in the Page title and the Page description.

Next we will want to select the fields that we want to show on the page. Before we do that though we will want to navigate to the form within Dynamics AX that we will be using as the template. In this case we are in the Customers form.
Once we have done that, just click on the + Select fields button.

This will turn on selection buttons within all of the fields that we are able to add to the form.
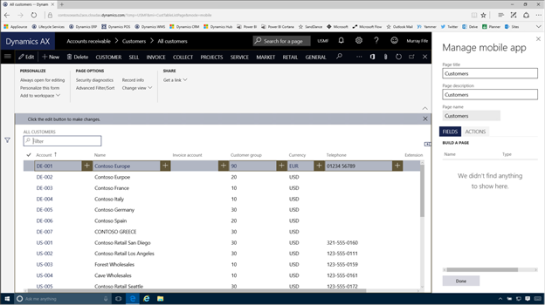
If we click on one (like the Account) then it will be added to the list of fields for the form.
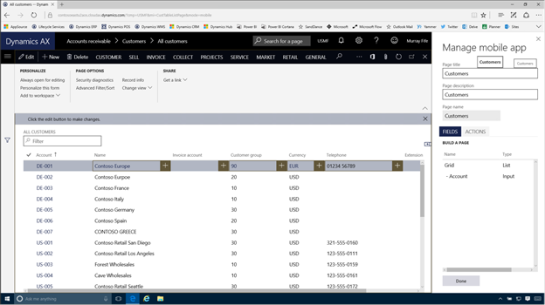
We can continue adding fields until we are ready to move on. When we are finished, just click on the Done button.
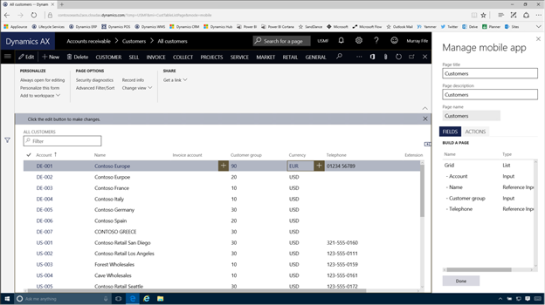
This will return the form back to its normal state. To finish the form we just want to click on the Back button.
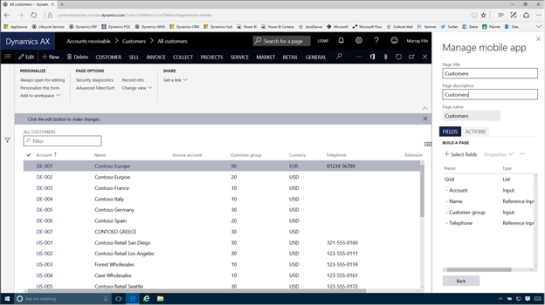
This will return us to the workspace form and we can see that our page has been added.

Adding a Detail Page
The app is pretty good right now, we will be able to scroll through all of the customers. But to make the app even better we will want to add a drill through page for the records that we show so that we can see even more information.
To do this we just need to select the main page that we just created and click on the Edit button.

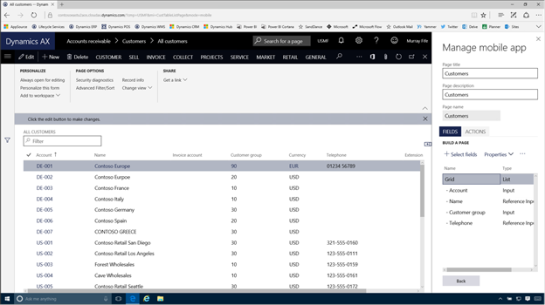
This will return us to the details of the page, and if we select the Grid entry in the list of fields we will see that the Properties button becomes enabled.
If we click on the Properties button then a few more options will show up. We are interested in the Add Detail Page option here. We don’t have a page already built so we just need to click on the Add page link at the bottom pf the panel.
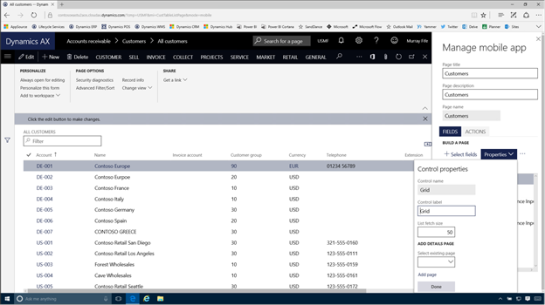
This will open up a new Page definition for us.

We just need to give the details page a Page name and a Page description.
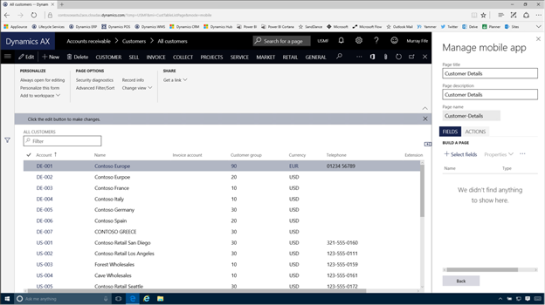
Before we start selecting fields though let’s drill into a details page for the record so that we have more to work with and then click on the Select fields button.
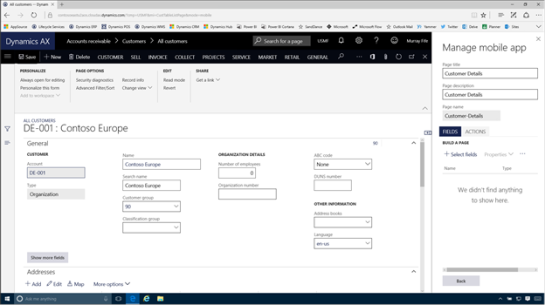
Now we will see that all of the fields on the details form have the +option that allows us to add them to the mobile app.

All we need to do is click on one and it will be added to the list of fields.
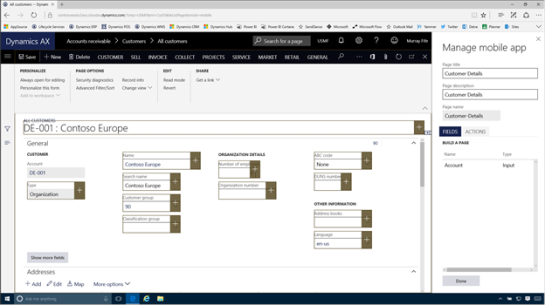
We can add as many fields as we like and when we are done, just click on the Done button.

Adding a new Action
There is one last thing that we will want to do here, and that is to create an Action. Actions are things that do something, like adding a new record, deleting a record, etc. We can add these to the pages by stepping through them and the system will record our actions and clicks and build a script in the background for us.
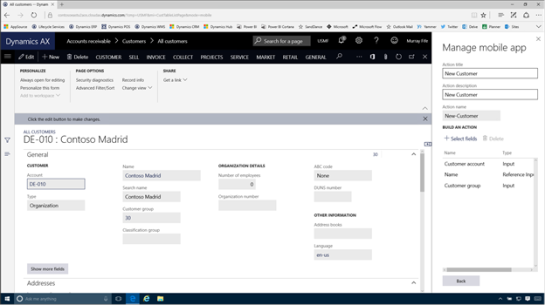
To do this click on the Actions tab and then click on the + Add Action button.
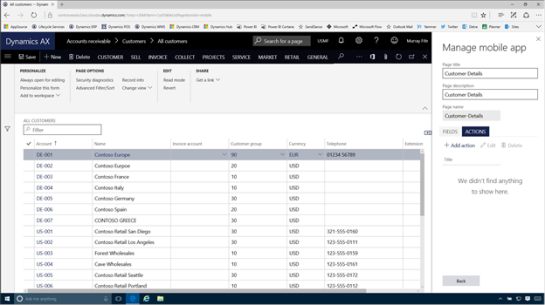
This will open up an Action definition page.
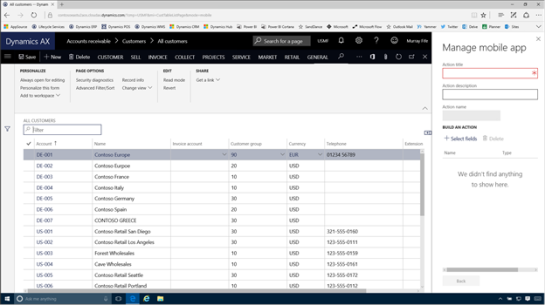
Just enter in an Action name and an Action Description.
Then click on the + Select Fields button which will switch you into the record mode and we can start teaching Dynamics the action.
In this example we just click on the New button in the menu bar to create a new Customer.

Then we step through the process as if we were doing it in real life.

As we move from field to field we will see that the fields we update get added to the list of actions.
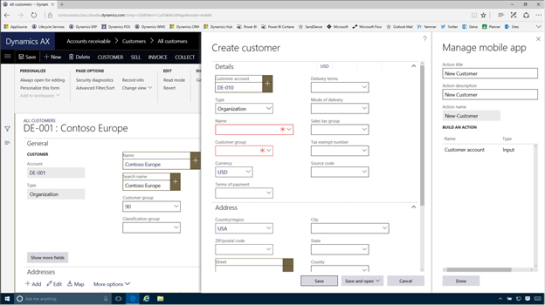
After updating all of the required fields we can click on the Save button for the customer.

This will return us back to normal edit mode within the mobile app and the action has been recorded for us.
Now we can just click on the back button to exit the action.
When we return to the detail page, just click on the Back button again.

This will take us back to the workspace and we can now click on the Done button.

Publishing the Workspace
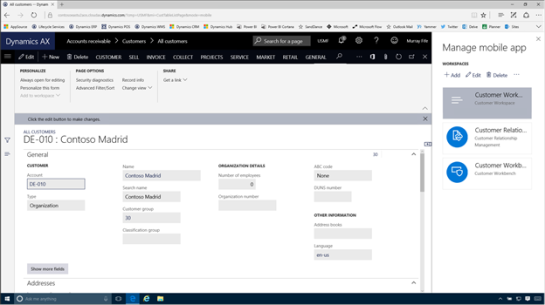
Now that we have created the workspace we will be given an option to publish the workspace. To do it just click on the Publish workspace link.

Now when we return back to the main page we will see that we now have a new application that the users will be able to use.
How it works…
To see this in action, we can return back to the mobile app and we will see that we still don’t have the new workspace that we created.

All we need to do is pull down the form a little and let go to start the refresh back to the server.

Within a second or two we will see that we now have a new workspace that we can click on.

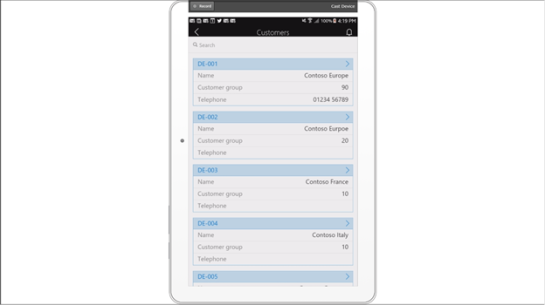
When we go into the workspace we will see the main page that we created, and we can click on it.

This will take us into the list page that we created, and because we have defined a detail page, we can also drill into the records by clicking on the > button.
Now we are in the detail form and we can see more fields. Notice down the bottom of the form though there is an Actions option. This shows up because we associated an action with this form when we designed it.
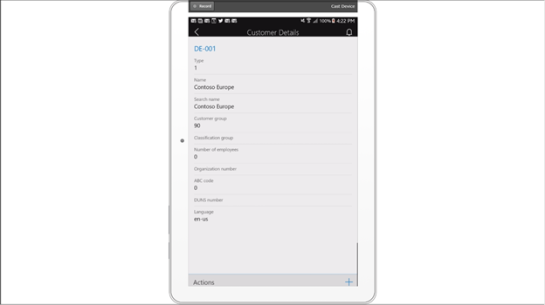
If we click on the Actions button it will show us the action that we defined earlier.
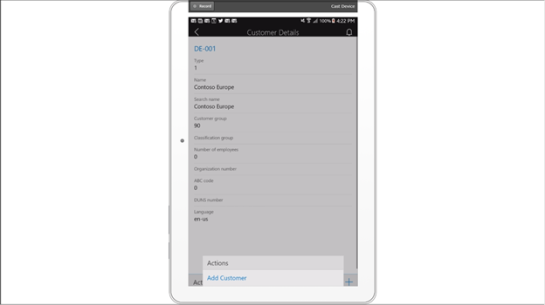
If we click on it we will be taken into the Add Customer page.
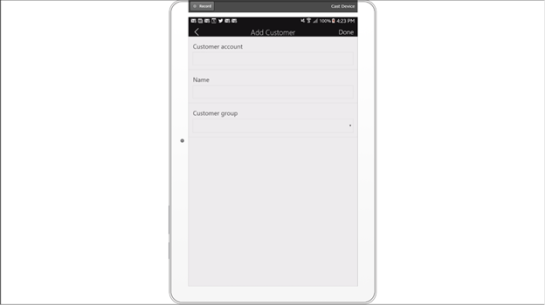
We can start updating the fields just like we would have within Dynamics.

Also notice that the dropdown boxes show us the valid values as well.

When we are done, just click on the Done button.

When we return back to the list page on the mobile app we will see that we now have a new record.
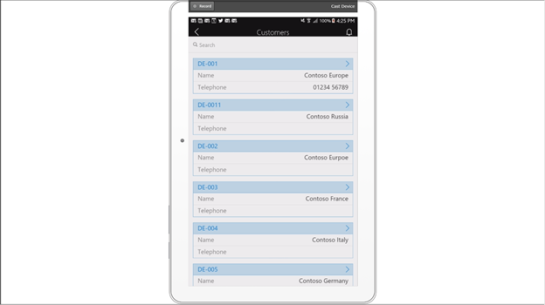
Also, when we return back to Dynamics we will see that there is a new record in there as well – which makes sense because the Mobile app is just another way of updating Dynamics.

Review
This new feature enables us to turn pretty much any form within Dynamics into a mobile form, without refactoring any of the base code, and also without writing a single line of code.
If you ask me, that is pretty darn cool.
About the Author
Murray Fife is a Technical Solution Professional at Microsoft and an Author of over 25 books on Microsoft Dynamics AX including the Bare Bones Configuration Guide series of over 15 books which step the user through the setup of initial Dynamics AX instance, then through the Financial modules and then through the configuration of the more specialized modules like production, service management, and project accounting. You can find all of his books on Amazon at http://www.amazon.com/author/murrayfife.
Murray is also the curator of the Dynamics AX Companions (www.dynamicsaxcompanions.com) site which he built from the ground up as a resource for all of the Dynamics AX community where you can find walkthroughs and blueprints that he created since first being introduced to the Dynamics AX product.
Throughout his 25+ years of experience in the software industry he has worked in many different roles during his career, including as a developer, an implementation consultant, a trainer and a demo guy within the partner channel which gives him a great understanding of the requirements for both customers and partner’s perspective.
For more information on Murray, here is his contact information:
Email: mufife@microsoft.com
Twitter: @murrayfife
Facebook: facebook.com/murraycfife
Google: google.com/+murrayfife
LinkedIn: linkedin.com/in/murrayfife
Blog: atinkerersnotebook.com
Docs: docs.com/mufife
Amazon: amazon.com/author/murrayfife
Share this post
- 0 comment
- Tags: Uncategorized
0 comment
