Using Excel to Import Customers and Vendors in Dynamics AX 2012
Posted by Author, Canine & Equine Choreographer, Citizen AI Data Scientist, and Dynamics 365 Global Black Belt at Microsoft on
At this point in my GuygAX project (a.k.a. implementing Dungeons & Dragons within ERP), I have been configuring all of my merchants and customers. Doing this by hand would take forever, so I decided to use the Excel Add-In make the loading of the records a little easier.
This process is not quite as simple as loading a table, because all of the contact information is initially stored within the Global Address book, and the tables that you update are slightly different depending on if you are creating an organization, or a person, but once we got the hang of it, importing became a breeze.
In this walkthrough I will show how to use the Excel Add-In for Dynamics AX to create a template that you can use to easily import customer and vendor records.
Importing Organizations into the Global Address Book
The first step in importing customers or vendors is to create Party records for them in the Global Address Book which will be used as the reference for the customer and vendor records. For Customer & Vendors, the entries in the Global Address Book can either be Organizations, or People, requiring a slightly different import process.
In this example we will show how to add an Organization Party to the Global Address Book.
Getting Ready…
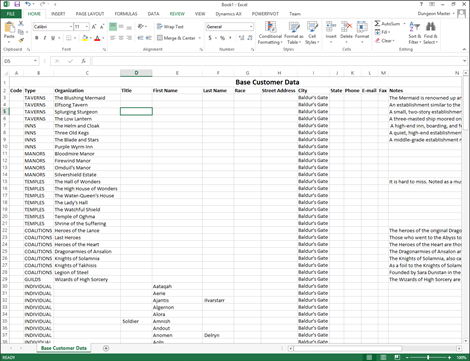
Before starting, it is a good idea just to gather all of your base data together. In our example we have all of the customer records listed out. We even classified all of the business at Baldur’s Gate by group to help with the reporting.
How to do it…
To import organizations into the global address book, follow these steps:
- From the Dynamics AX ribbon bar, click on the Add Data button within the Design group, and select the Add Tables menu item from the drop down.

- Search the available tables for the DirPartyTable table, and add it to the selected tables.
- At the same time, select the CustTable table, and add it to your Excel template as well. We will use that later on in the walkthrough.

- Once the import worksheet is created, click on the Fields button within the Design group of the Dynamics AX ribbon bar to switch to entry mode.

- Copy the organization name from the base data sheet and paste it into the Name column of the import worksheet.
- For each of the organizations, assign a unique Party ID.
- Tip: We created a computed field in the base data sheet that would automatically number the organizations making this easier.
- Then in the Party Type column, set all of the rows to Organization.
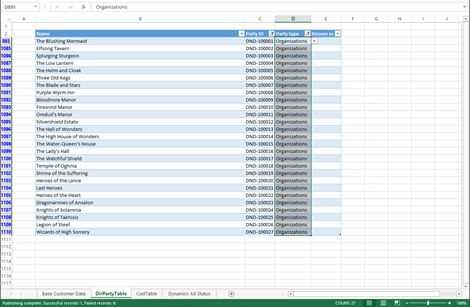
- Now, click on the Publish button in the Update group of the Dynamics AX ribbon bar, and select the Publish Selected option to update Dynamics AX.

- After this has finished, you can check the Dynamics AX Status worksheet and you should see that all of the records were successfully published.
Importing People into the Global Address Book
Importing People into the Global Address Book is done is a similar way as the Organizations.
In this example we will show how to import person records into the Global Address Book.
How to do it…
To import people into the global address book, follow these steps:
- Select the DirPartyTable worksheet, and copy the Name into the Name and Known As columns.
- Then copy over the unique Party ID.
- For the Party Type select the People option from the dropdown and copy it to all of the new rows that you added.
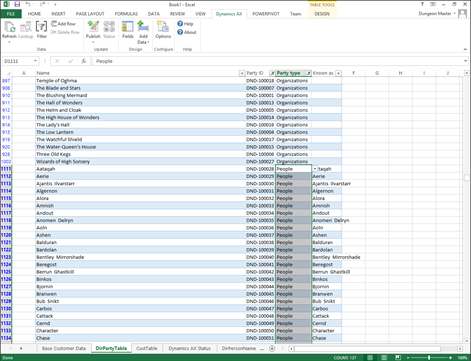
- Now, click on the Publish button in the Update group of the Dynamics AX ribbon bar, and select the Publish Selected option to update Dynamics AX.
How it works…
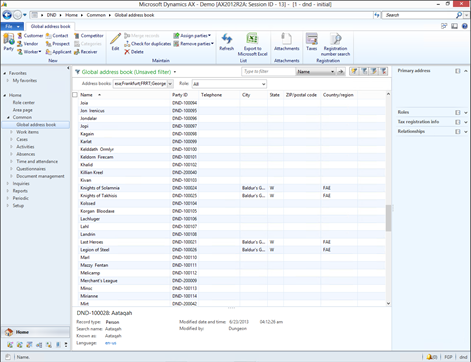
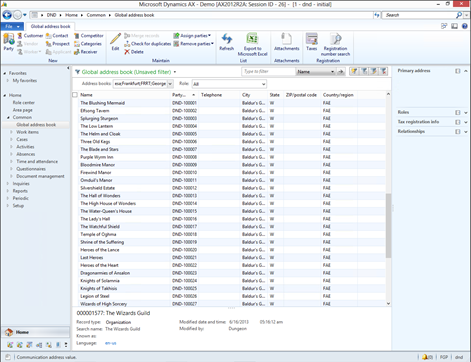
If everything goes well, then all of your records should be published to Dynamics AX. If you want to see all of the imported records, then open up the Global address book form within the Common group of the Home area page.
Importing Customers
Once you have the parties configured in the global address book, you can now link them to Customer records within Dynamics AX.
In this example we will show how to import Customers.
How to do it…
To import customers from Excel, follow these steps:
- Select the CustTable worksheet and make sure that you are in Edit mode – i.e. the fields do not show on the left hand side.
- From the base data worksheet, copy over the unique ID into the Name.PartyID column.
-
Then copy the ID into the Customer account column.
Note: If you want to use a different numbering sequence for the Customer account then you can.
- Copy the group into the Customer group column and also make sure that you have a base currency in the Currency column.

- Now, click on the Publish button in the Update group of the Dynamics AX ribbon bar, and select the Publish Selected option to update Dynamics AX.
How it works…
Now you can open up the All customers form, and you will see all of the new customer records.
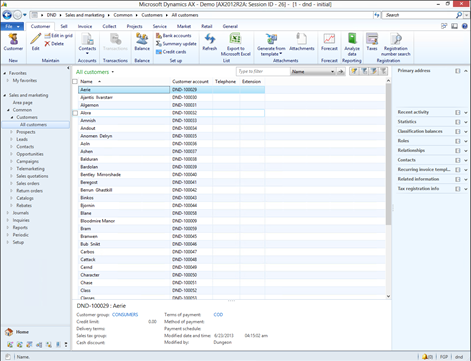
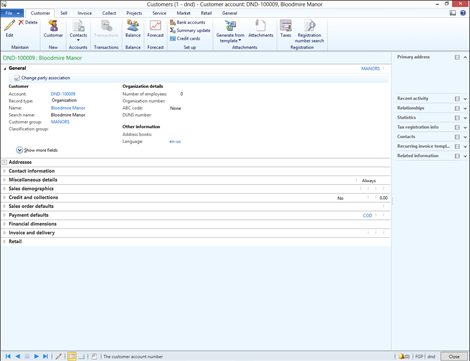
If you drill into the detail form, then you should be able to see the base information for each of the customers.
Importing in Postal Addresses
If you want, you can also import in the address information for the customers through Excel. Since each of the addresses have their own record to check for duplicate entries, this involves a few additional tables, but it’s not hard to do.
In this example we will show how to import addresses and associate them with Customers.
How to do it…
To import postal addresses through Excel, follow these steps:
- From the Dynamics AX ribbon bar, click on the Add Data button within the Design group, and select the Add Tables menu item from the drop down.
-
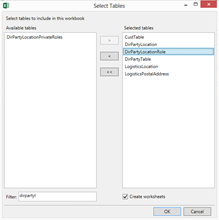
From the available tables, select the following tables:
- LogisticsLocation
- DirPartyLocation
- LogisticsPostalAddress
- DirPartyLocationRole
- Select the LogisticsLocation worksheet and create rows for each of the entries in the Global Address Book that you have addresses for.
- Assign a unique ID to the Location ID column.
Tip: For our examples, we just added a suffix to the end of the Party ID value. This makes it easier to track. Also, if your party has multiple addresses, then you can just increment the suffix. - Also, set the Postal address field to Yes for all of the rows.

- Now, click on the Publish button in the Update group of the Dynamics AX ribbon bar, and select the Publish Selected option to update Dynamics AX.
-
Next select the LogisticsPostalAddress worksheet and add rows for each of the addresses with the full street address, linking back to the LogisticsLocation record through the Location.Location ID column.
Note: you may need to add some additional fields to the template for the Street, City etc.
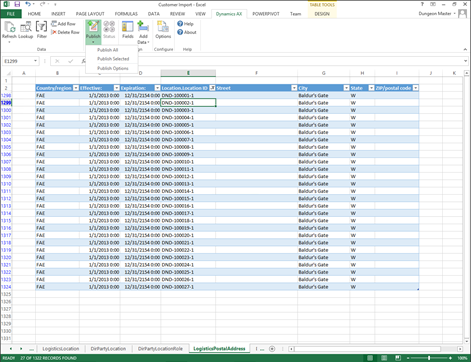
- When you are done, click on the Publish button in the Update group of the Dynamics AX ribbon bar, and select the Publish Selected option to update Dynamics AX.
-
Now we can link the address to the customer account. To do this select the DirPartyLocation worksheet.
Note: Before entering in the data though drag the PostalAddress field from the field chooser over to the worksheet.
- Copy the ID’s for the postal address records into the Location.Location ID column.
- Copy the Party ID’s for the customers into the Name.Party ID column of the worksheet.
- Finally, set all of the Postal Address column records to Yes.
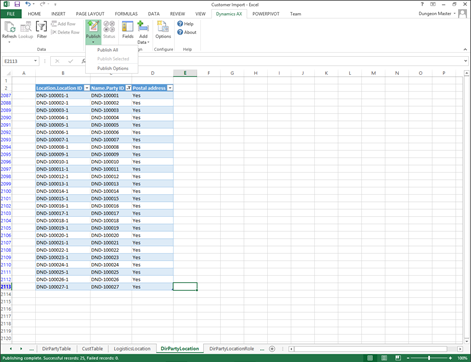
- When you are done, click on the Publish button in the Update group of the Dynamics AX ribbon bar, and select the Publish Selected option to update Dynamics AX.
- To finish off the setup, we want to associate a role with the address – i.e. Home, Business, Delivery etc. To do this, select the DirPartyLocationRole worksheet.
- Copy the ID’s for the postal address records into the Location.Location ID column.
- Copy the Party ID’s for the customers into the Name.Party ID column of the worksheet.
- In the Location role.Role column set the row values to Business.
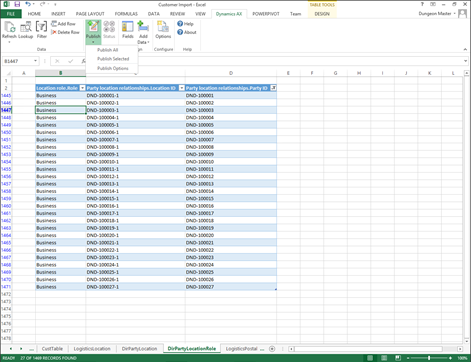
- When you are done, click on the Publish button in the Update group of the Dynamics AX ribbon bar, and select the Publish Selected option to update Dynamics AX.
- If you want everything to be tied up with a neat little bow, then make one final update, and associate the locations that you just created with the records in the Global Address Book by updating the Location.Location ID column on the DirPartyTable worksheet.

How it works…
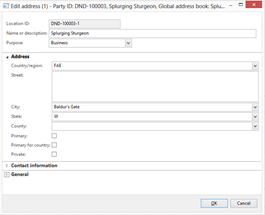
Now if you look at your customers, the default address information will show up in the customer list.
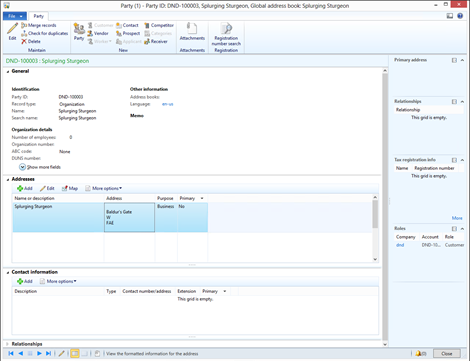
If you look at the customer detail, then you will see all of the addresses that you imported.
Drilling into the addresses will allow you to see and update any of the information that you imported.
Importing Vendors
You can import Vendor records exactly the same way as the Customers by linking them back to the records in the Global Address Book.
In this example we will show how you can use Excel to import Vendor records.
Getting Ready…
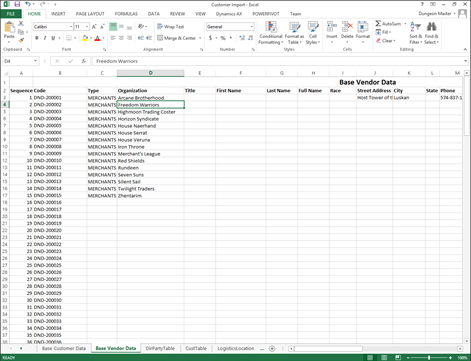
Just as with the Customer records, it is a good idea just to gather all of your base data together into a template worksheet so that you can manipulate and massage the data before importing.
How to do it…
To import vendors through Excel, follow these steps:
- From the Dynamics AX ribbon bar, click on the Add Data button within the Design group, and select the Add Tables menu item from the drop down.
- Find the VendTable table and add it to the selected tables.

- Add the vendors to the DirPartyTable worksheet, and when you are done, click on the Publish button in the Update group of the Dynamics AX ribbon bar, and select the Publish Selected option to update Dynamics AX.
- Now switch to the VendTable worksheet and add rows for each of the vendors that you want to import.
- Copy the vendor group into the group column and also make sure that you have a base currency in the Currency column.

- When you are done, click on the Publish button in the Update group of the Dynamics AX ribbon bar, and select the Publish Selected option to update Dynamics AX.
How it works…
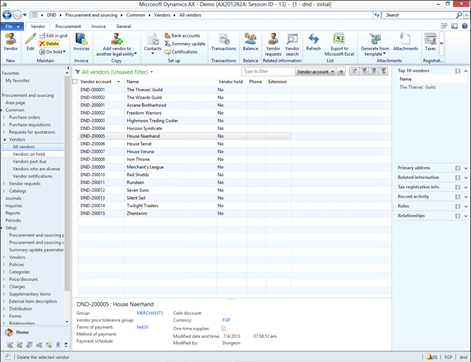
If everything is OK, then the records should be imported into Dynamics AX and you can view them through the All vendors form.
Summary
In addition to everything that we have shown here in the walkthrough, you may also want to try:
- Import in phone numbers, and emails
- Importing Contacts
- Importing Prospects
Once you get the hang of the import process, then creating global address book entries, and linking them to customers and vendors becomes a simple process.
Share this post
- 0 comment
- Tags: Dynamics AX
0 comment
