Creating One Master Menu to Get Just What You Need
Posted by Author, Curator, Visually Impared Squirrel Literacy Advocate & Dynamics AX Technical Solution Professional (TSP) at Microsoft on
Sometimes the menus within Dynamics AX can be a little overwhelming because there are so many different menu items, and really you just use a handful of the menu items on a daily basis. Also, sometimes to perform a business flow you need to go to a couple of different area pages in order to find all of the things that you need.
You can use the Favorites to create a collection of all the menu items that you use, but if you really want to be clever you can create your own custom menu which will become your go-to location to find everything that you need. This also gives you the option to re-arrange the business processes a little so that they follow a more business process centered flow. You only have to go off the reservation if you need to find a menu item that you don’t usually use.
In this walkthrough we will show you how you can create a new Master menu that has just the menu items that you need.
How To Do It…
- For this tweak we need to get into the development environment. The quickest way to do this is just press CTRL+D.
- Once you are in AOT, expand the Menu group so that you can see all of the menu area pages and then right-mouse-click on the Menus folder and click on the New Menu item to create a new menu for our master page.
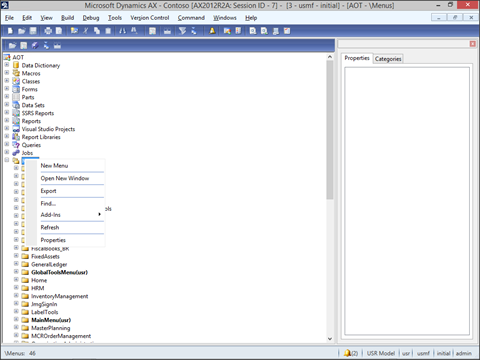
- That will create a new menu link for you. Within the properties panel change the Name and Label to Master.
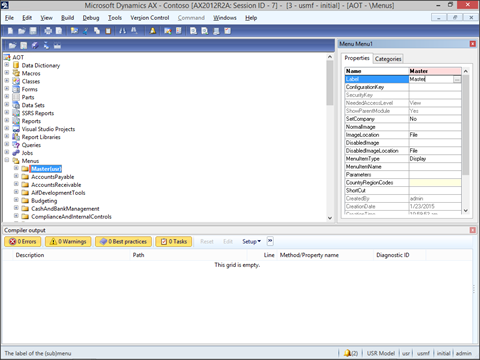
- Now we want to create groups for each of our business processes. To do this, just right-mouse-click on the Master menu and click on the New menu item and then select the Submenu option.
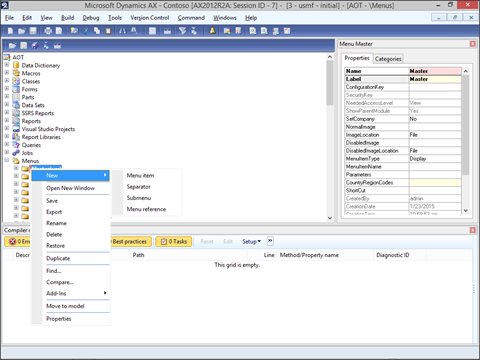
- This will create a new folder for you under the master menu and you can change the Name and Label properties to Financials.
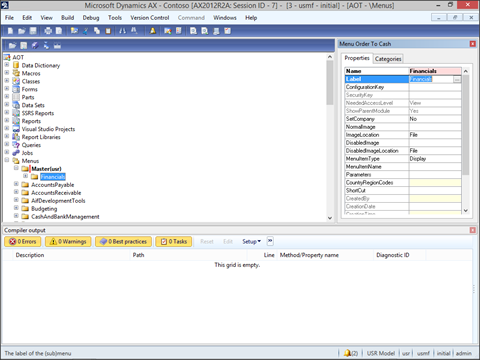
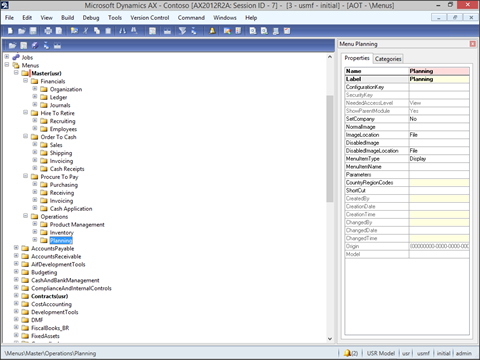
- Repeat the process for the other business processes that we commonly use i.e. Hire To Retire, Order To Cash, Procure To Pay, and Operations, and then repeat the process for each of the business processes under each of the business processes.
- Now right-mouse-click on the Master menu and select the Open New Window menu item and tile the windows so that you can see both the AOT tree and the menu. Then navigate to the menu items that you want to include in the Master menu and drag them over to the business process that they belong in. Keep on doing this for all of the menu items until your menu has all of the main business forms added to it.
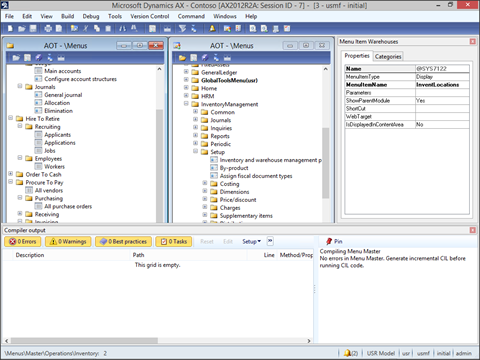
Tip: Make sure that you are pressing the CTRL key when you do the dragging so that you make a copy, and don’t just move them. - Now we need to add an icon to the menu so that it looks like all of the other menus. To do this, click on the Master menu and then change the Image Location property to EmbeddedResource. That will allow you to click on the … at the right of the Normal Image property and search through the resource file for a menu icon that looks good. 10054 looks like a keeper.
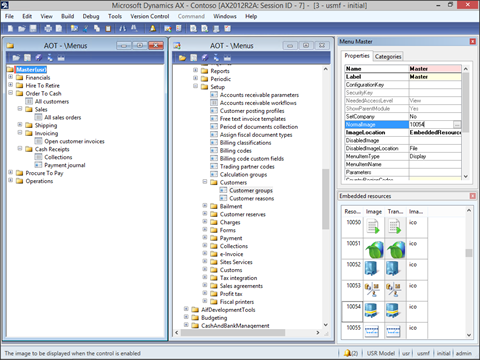
- Now click on the Save button to update the menu.
- Next we need to add the menu to the main menu so that we will be able to access it. Start off by expanding out the MainMenu menu item within the Menus group. Then right-mouse-click on the MainMenu folder, select the New menu item and then click on the Menu Reference menu item.
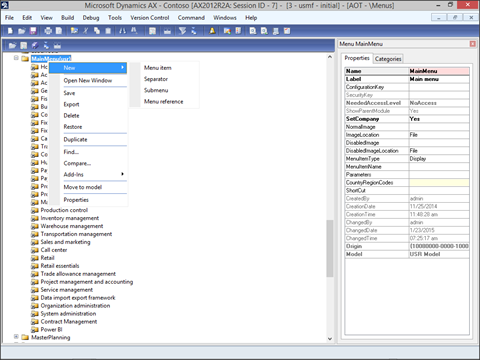
- This will open up a new Select Menu list – you may need to tile the windows to see both it and the AOT window. All you need to do is drag the Master menu from the list of menu items into the MainMenu menu.

- After you have done that, save the changes and then exit the Dynamics AX Client and restart it to refresh the menus.
How It works
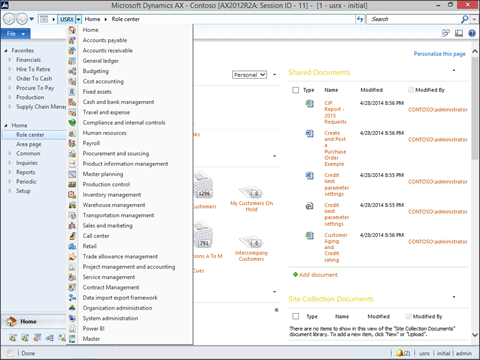
Now when you look at the list of menus you will see the Master menu has been added to the list.
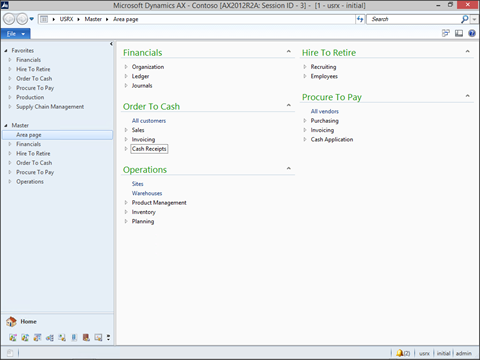
When you click on it you will see your new menu with just the key business processes and menu items.
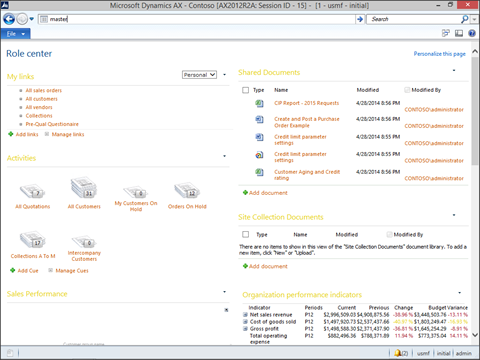
Tip: To get to the master menu from anywhere, just press F11 to access the breadcrumb bar and then type in Master. You will instantly be transported to the Master menu.
Summary
You can use this procedure in other ways as well. Rather than including all of the business processes in one menu, you could break them out into their own menus so that you can give them to certain user groups to make their lives a little less complicated.
How cool is that!
Additional Resources: If you are looking for a more detailed walkthrough of all the features and functions then you can check out the Dynamics AX Companions site. Just click on the images below to find it.
About The Author:
Murray Fife is a Microsoft Dynamics AX MVP, Author of over 20 books on Microsoft Dynamics AX, and Solution Architect at I.B.I.S. Inc. with over 20 years of experience in the software industry. Like most people in his industry he has worked in many different roles during his career, including as a developer, an implementation consultant, and a trainer which gives him a great understanding of the requirements for both customers and partners. He is a regular contributor to the Dynamics AX community and in addition to hosting presentations for I.B.I.S. presents regularly for the AXUG and MS Dynamics World, has spoken at Microsoft Convergence and AXUG Summit conferences. If that was not enough, he works closely with Microsoft evaluating with their beta products and also is a Council Member on the Microsoft Dynamics Academic Alliance trying to help educate the new generation of consultants on Dynamics AX.
Share this post
- 0 comment
- Tags: Dynamics AX
0 comment


